Creating a DLL
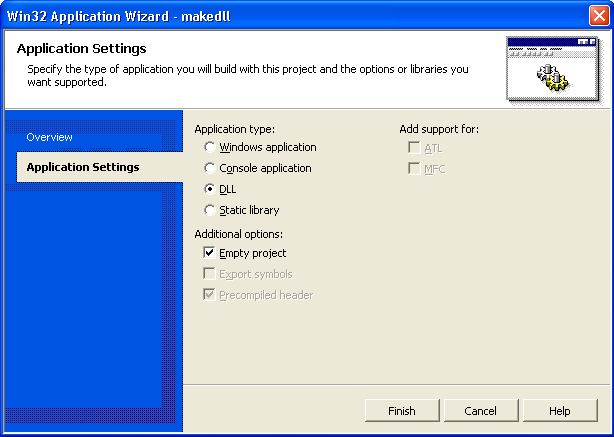
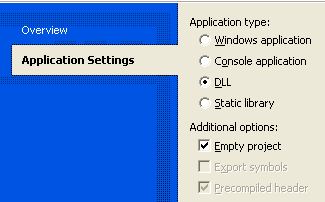
- Create a DLL project. I'll assume you know how to do this. In MSVC 7 you would create an empty project, then under Application Settings you check DLL and empty project.
- Add the source files under the /Source directory to the project. If you don't plan to use voice capabilities, leave out everything with "RakVoice" in the filename.
- If you want to use voice capabilities, add the source files under the speex-1.1.4\libspeex directory except the four that start with test, speex_preprocess.h, and preprocess.c.
- Add to "Additional Include Directories" your directory with the source files.
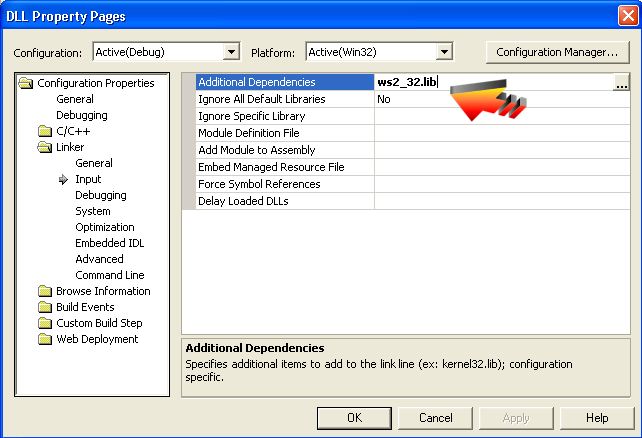
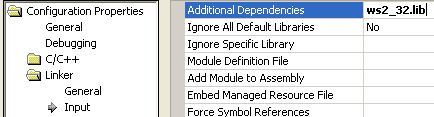
- Import ws2_32.lib, or wsock32.lib if you don't have Winsock 2 installed. In MSVC 7 you can right click on the project, select configuration properties / linker / input / additional dependencies and type "ws2_32.lib" in there.
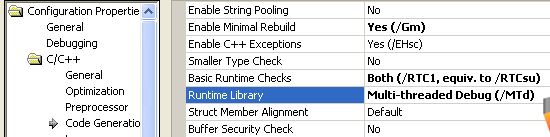
- Set your project to use multi-threaded runtime libraries. In MSVC 7 you can right click on the project, select configuration properties / C/C++ / Code Generation / Runtime Library and change it to Multi-threaded (/MT).
- Optionally set your preprocessor directives.
- Then hit F7 or the equivalent to build your DLL and Lib.
|
|
Creating an empty DLL project in .net 2003 |
|
|
Setting Multithreaded debug in .net 2003 |
| |
Including ws2_32.lib in .net 2003
|
Game Setup
- Copy the DLL you just created to your game in the same directory as the exe. The lib can be in any directory you want.
- Add the .lib to your project
- Add the required source files to your project:
- NetworkStructures.h (Optional - if you want to define packet structures)
- Source/Optional/* (Optional - to use distributed objects and/or the multiplayer class)
- SHA1.cpp (Optional - if you do file verification as in the sample)
- GetTime.h/.cpp (Helper class, also required if you include Source/Optional/*)
- BitStream.h/.cpp (Helper class, also required if you include Source/Optional/*)
- RakNetworkFactory.h
- RakClientInterface.h
- RakServerInterface.h
- RakPeerInterface.h
- NetworkTypes.h
If you get any linking errors related to a bitstream, you should also include Bitstream.cpp and Bitstream.h
If you want to jump right in, refer to the Basic code tutorial
For more detail, refer to Detailed Implementation
|