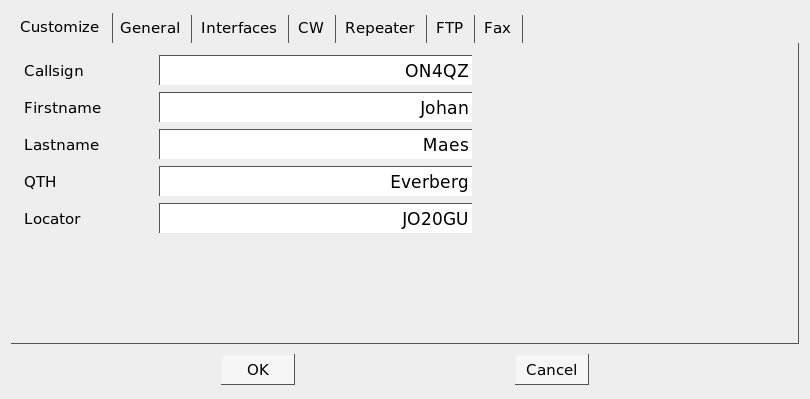
This panel is part of the QSSTV receive window Options menu. This lets you setup the QSSTV operation settings. You will need to setup a new configfile if you run the program as a different user (or simply copy an existing one in your new home directory). You can click on the different tabs to switch to the different tab-windows. Note: All settings will be saved on exiting QSSTV (including the active settings in the receive and transmit window).
Put your callsign here. It will be used in the templates with the %m macro.
default: none
Put your firstname here. It will be used in the templates with the %f macro.
default: the home directory
Put your firstname here. It will be used in the templates with the %n macro.
default: none
Put your QTH here. It will be used in the templates with the %q macro.
default: none
Put your locator here. It will be used in the templates with the %l macro.
default: none
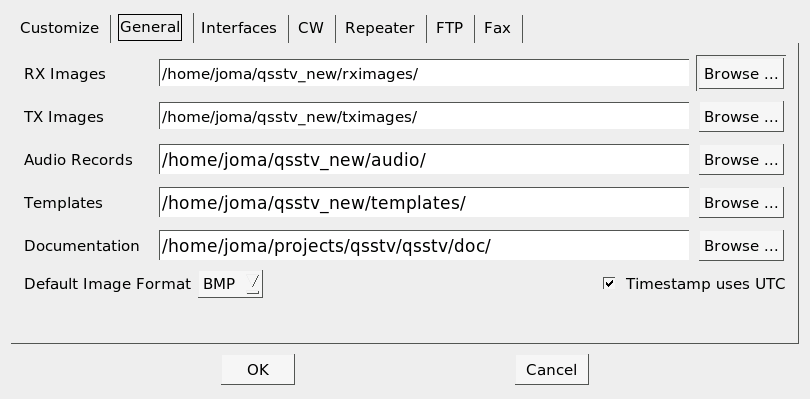
This is the path to the Receive image folder. You can browse to the folder and then save the path by clicking <OK> in the browse window.
default: the home directory
This is the path to the Transmit image folder. You can browse to the folder and then save the path by clicking <OK> in the browse window.
default: the home directory
Only usefull in debugging mode . You can browse to the folder and then save the path by clicking <OK> in the browse window.
default: the home directory
This is the path to the Transmit image folder. You can browse to the folder and then save the path by clicking <OK> in the browse window.
default: the home directory
This is the path to the folder where the user guide is. You can browse to the folder and then save the path by clicking <OK> in the browse window.
default: /usr/share/doc/packages/qsstv
This button lets you select the format that you can save the image files to (PNG, BMP, XBM,JPEG ...)
Note: You cannot select the GIF-format due to patent restrictions. GIF is not a free format. If you enabled GIF read support in Qt, then you will be able to import GIF-images.
default: PNG
When on time will be UTC otherwise localtime
default: True
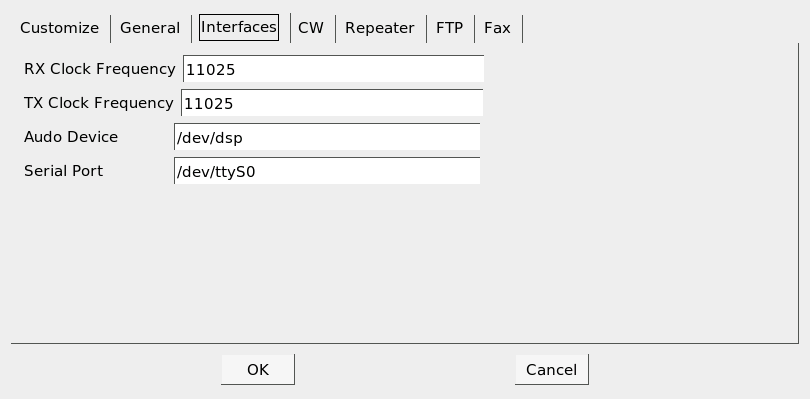
The clocks on soundcards are not very accurate, so you will probably need to adjust the clocks. If the soundcard uses the same clocksource for receive and transmit, then the RX and TX clock settings will be the same.
This setting controls the video receive sample clock frequency rate.
default: 11025Hz
This setting controls the video transmit sample clock frequency rate. This value will also be changed when you use the SlantAdjust option.
default: 11025 Hz
This is the default Linux audio device that QSSTV uses. Most of the time it is a symbolic link to /dev/dsp0. If you have more than one soundcard, use the correct device (e.g. /devdsp1).
default: /dev/dsp
This is the default Linux serial port device, that is used to key the radios PTT circuit. (remember ttyS0 is equivalent to com1 under DOS, ttyS1 is equivalent to com2).
default: /dev/ttyS0
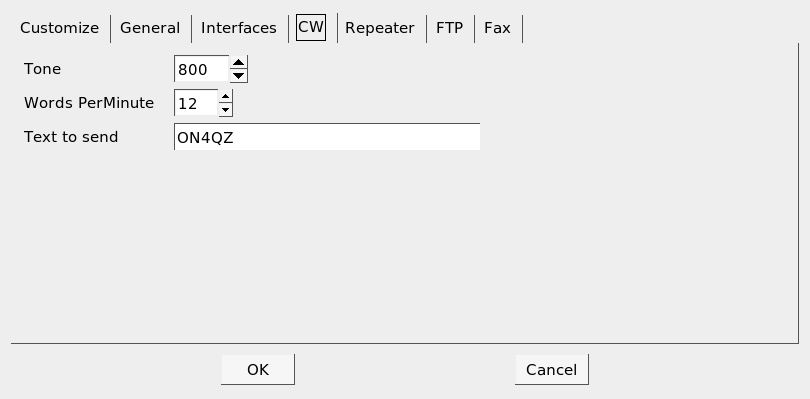
Set the frequency of the CW transmitting tone from 400 Hz to 2300 Hz.
default: 1200 Hz
Set the speed at which the CW is sent from 4 to 30 WPM.
default: 12
Holds the text you wish to send via CW. Such as your callsign.
default: qsstv
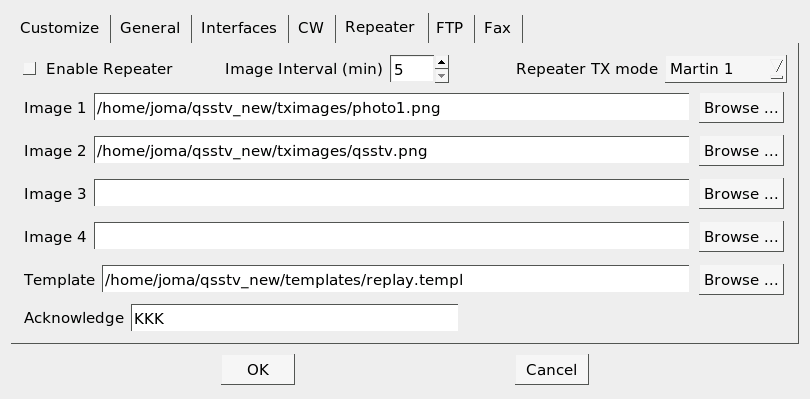
Enable repeater at startup images that are automatically sent when the repeater is idle for "image interval" minutes
default: off
Interval time (i.e. idle time) in minutes. When the repeater does not receive any images for "interval time", then it will send one of the 4 beacon images.
default: 5 min
TX mode used when automatically sending pictures. The pictures are sent when the repeater is idle for more than "image interval" minutes.
default: Martin 1
If you only use one entry, then the interval we be 4 times "image interval". I suggest you fill in all 4 entries. You can specify 4 times the same file.
default: none
Text sent in CW in response to a 1750 Hz toneburst.
default K
Holds the template image to be overlayed on the transmitted image. You can ofcourse make use of the text macros in the template.
default: none
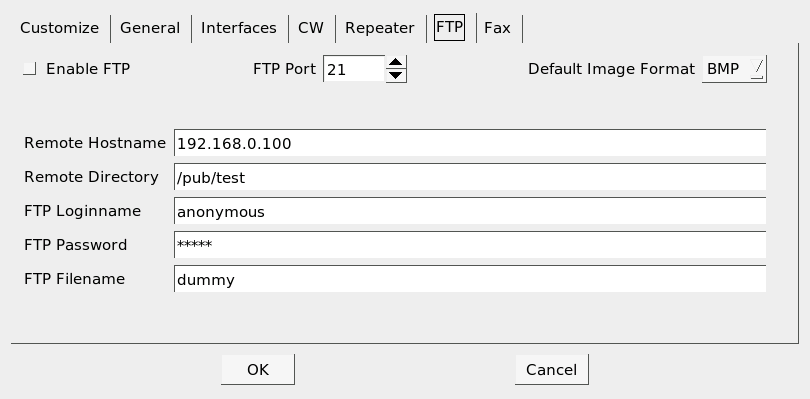
FTP is used to automatically transfer images to a local or remote computer. When an image is received and FTP is enabled then QSSTV will transmit the image using the FTP protocol. QSSTV will login and use the specified password. This has been developed primarily for use with java-applets on webservers, this way one can publish sstv pictures in realtime on the web.
Enable FTP transfer when image is received
default: off
The port number of the remote FTP server.
default: 21
Image format to be used when transferring files in ftp
default: png
default: none
The relative path to the directoy (e.g. /incoming or /pub/sstvcam)
default: none
The loginname on the remote computer
default: anonymous
The password on the remote computer
default: user@net
default: none
>ftp my.computer
Name(my.computer:your_login_name): your_loginname
331 Guest login OK, send your complete e-mail address as password
Password:your_password
230 login ok
Remote system type is unix
Using binary mode to transfer files.
ftp> cd /incoming
250 CWD command successful
ftp>put im.jpg
local: im.jpg remote: im.jpg
200 Port command successful
150 FILE: im.jpg
225 Transfer complete
1392 bytes sent in 0.00028 secs (4.9e+03 Kbytes/sec)
If you see this (or something similar) FTP from whithin QSSTV should work. If you see errors, try to fix them first, before trying to use it in QSSTV (because you have more control over it and you can tun on the verbose mode in ftp).
NOT YET IMPLEMENTED
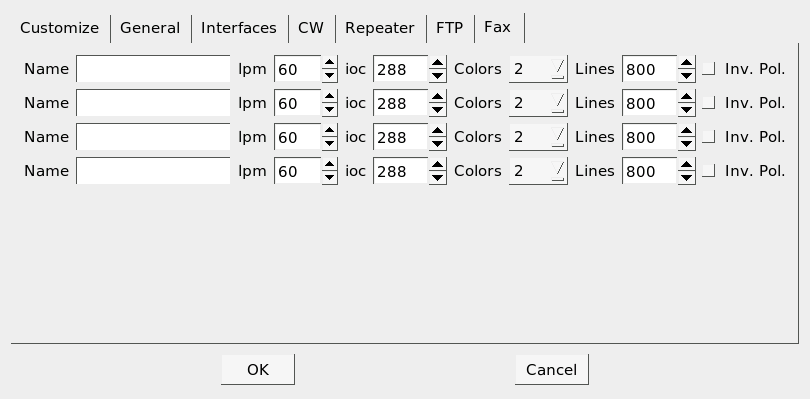
You can predifine certain type of faxes (e.g. weatherfax) and give them a name. There is a selection button in the receive window to select a predefined fax-type.
Name of the fax-type (choose whatever you want)
default: fax[1..4]
Lines Per Minutes spinbox
default: 120
Index of Cooperation spinbox: this defines the ratio width to height
default: 288
The number of gray-levels to be used
default: 256
Maximum number of lines to be recorded.
default: 800
This enables the detection of inverted phasing signals. (i.e. 5% black 95% white)
default: NO