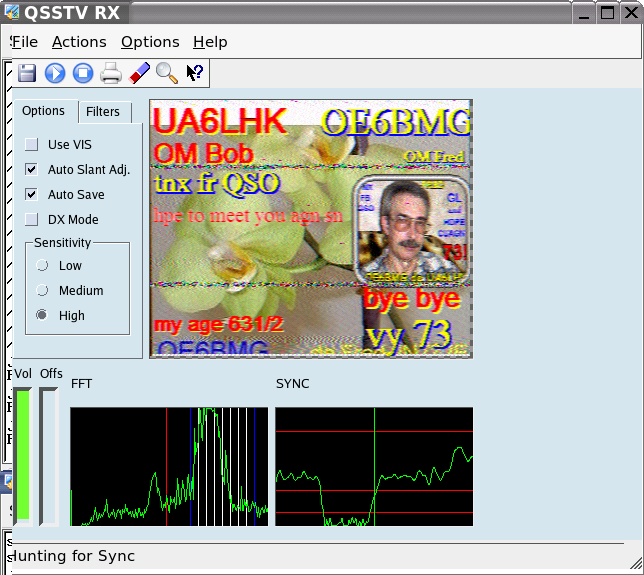
The receive panel contains the main window for receiving pictures. The picture canvas size is 320 x 256 by default. The canvas adapts itself automatically depending on the mode ( robot, martin,P3,..) of the received image. This panel also contains a spectrum display and a scope allowing you to view the SSTV signals for tuning purposes.
Key-binding: Alt+F

Key-binding: Ctrl+S

Key-binding: Ctrl+P
Shuts down the QSSTV program and saves all active parameters. The size and the position of the windows on the desktop is also saved and will be restored when QSSTV is launched again.
Key-binding: Ctrl+X
Key-binding: Alt+A

Key-binding: Ctrl+A

Key-binding: Ctrl+C

Key-binding: Ctrl+E

Key-binding: Ctrl+Z
Note: There is a limit on the memory size. The zoomfactor will be limited accordingly. This can happen with large FAX images.

Key-binding: Alt+O
This lets you setup the QSSTV default startup settings. The settings are written to the qsstv6rc file located in the ./qt directory of your home directory.
This function will start the receiver and display lines that have a duration of exactly one second. If you tune in to a radio station such as WWW or BPM, then a vertical pattern will start to show. If you have entered the exact receive clock, then the line will be 100% vertical.
Note: Observe the spectrum display and tune the radio so you have the tone at approximately 1200 Hz.
Key-binding: Alt+H
Access to the file your reading now.
Key-binding: F1
QSSTV Author and version information.
if you select this checkbox, image reception will start after the detection of a valid VIS code. This code is sent at the beginning of an image to indicate which sstv mode is to be used. The program will switch to that mode without user intervention.
The program will automatically select the mode when this button is unchecked. It will use a special algorithm to select the correct mode, based on the linetiming of the image. The mode name will be displayed at the bottom right corner of the receive window.
Note: Using the automatic reception is the prefered method.
When this box is checked the program will automatically correct the slanting of the received image. Sometimes it needs more than one correction during the image reception.
When this button is selected, images will automatically be saved to the default Rx image folder without user intervention
This function will disable the automatic resync to top of image when receiving noisy signals. (hince the name DX)
This combobox lets you select low,medium or high sensitivity for the sync detection. Select high for noisy conditions and low for strong signals. When you select high sensitivity, then false triggering can occur. If this happens, click the start button again.
NOT YET IMPLEMENTED
Shows the volume of the received signal.
Shows the frequency offset of the synchronisation pulse. The indicator should stay more or less in the middle.
Shows the spectrum of the received signal You can use this to tune your receiver to the correct frequency. Align the lower (1200 Hz) peak with the vertical red line. You also have markers every 100 Hz from 1500 to 2300 Hz. if you click on the spectrum display, the display will toggle between the classic spectrum view and the waterfall view.
The scope on the right gives you a picture of the synchronization pulse. The raising edge should stay correctly aligned with the red marker. This is also a good indicator for the receive quality. The view of the sync pulse will be distorted if you use narrow postfilters.